While the girls are sleeping, I wanted to get this post out.
I had a few requests for a tutorial on this style of bow. Since I
can't do korker bows right now I have found a new hair bow that I am enjoying. I call it my Gardenia bows. To me it looks like some Gardenia flowers I have seen. What is ironic is that I am allergic to Gardenias. I can still appreciate their beauty.
 |
| Favorite Gardenia Flower Bow, so far. |
 |
| 1st Attempt of a Gardenia flower hairbow. |
The first one I made I gave
as a gift attached to the bow holder I made as a birthday present. It was the favorite of several of the birthday guests as well as others who saw my post.
Now each time I make it I learn something new.
Materials:
- Ribbon (You can use almost any size)
- For the 2 outer bottom layers I used 5/8" ribbon.
- For the 2 top inner layers I used 3/8" ribbon.
- Circle for the center anchor piece (felt, foam, use your imagination)
- A peace symbol foamie from a bag I got on clearance at Michaels.
- Scissors
- Flame/Heat source to seal the end of the ribbons you cut (I use a lighter.)
- Glue (Using a hot glue gun works best for me.)
- Embelishment of choice for the center (A crystal like gem looks nice.)
- Preferred type of hair accessory to attach the bow. (I use a ribbon covered single prong metal hair clip.)
Step 1. Cut 8 ribbons for each layer. Start with the largest ribbon for the outer layer. I chose to start with 4 inches.
 |
| Cutting 4 inch length of 5/8" ribbon |
Step 2. Heat seal the ribbon on the ends to keep them from fraying.
Step 3. Take your first 4 inch ribbon, put a dab of glue on the top bottom piece of the ribbon, create a loop and glue just the bottom ends together. The loop is like those remembrance ribbons,
just don't leave any tail. Maybe if I say it is half of an infinity symbol? Not quite sure how to explain it.
I hope the pictures help.
 |
| The loop to glue. Looks like a cone with shorter ribbon. |
Step 4. Attach each loop at the end onto the top of the circle. Placing each loop across from the other making a cross pattern. Each set of 4 loops makes a square or cross. The first layer is 8 loops.
 |
| 1st cross pattern of 1st layer of ribbons. |
 |
| Finish 1st bottom layer of bow filling in the gaps. |
If you turn your creation upside down it looks like a flower too.
 |
| Upside down, bottom view of the bow with loops attached to foam circle. |
Step 5. After your first set of 8 ribbon loops creating the bottom layer, repeat each layer using smaller ribbon loops. My 1st attempt, picture above, I only did 1 complete layer of 8 ribbons and only 4 ribbons on the top/last layer.
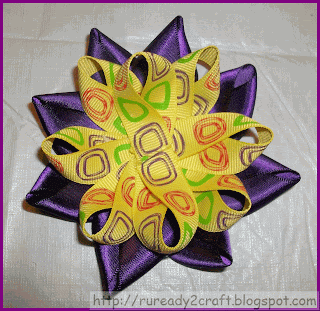
You can experiment with lengths and widths of the ribbon. With this purple/yellow Gardenia flower bow below, both layers are the same size length, 4". The purple ribbon is 7/8" ribbon.
 |
| 7/8" purple ribbon 4" long, 5/8" yellow ribbon 4" long. |
Step 6. I suggest your last layer be with 3/8" ribbon, it really looks good like the bow below.
 |
| Purple Gardenia Flower Hair Bow. |
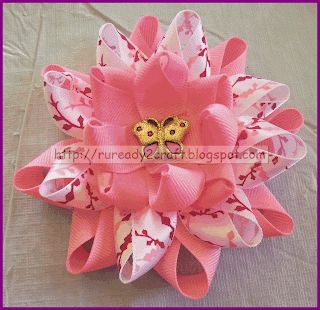
If you stay with the 5/8" size you may not want to do as many layers. I wasn't thrilled with the outcome of the pink ribbon flower below. It is one I would like to change. I don't like the last layer of the 5/8" ribbon. The pink one was the 2nd one I had ever made, so I learned to use the 3/8" ribbon for the last layer like in the blue and purple ones above.
 |
| Least favorite Gardenia flower craft bow. |
Step 7. Place chosen embelishment in center of flower. My daughters always pick the embellishments for the middles.
 |
| Almost looks like a crown for a princess! |
Step 8. Attach Gardenia flower to the hair accessory of your choice. I attached it to a single prong metal hair clip.
 |
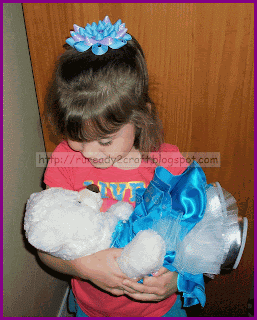
| Handcrafted Blue Gardenia Flower Hair Bow. |
After wearing it a few times, it seems that others seem to think it looks like a crown on my daughters head. So maybe I should call it a Crown Flower Bow.
What do you think I should call it?
I am linking up to these craft parties!


Those kind of bows remind me of a gift bow :) The perfect Christmas hair bow!
ReplyDeleteIt does. If I put a loop of ribbon in the middle instead of an embellishment, it would for sure!
ReplyDeletethanks for posting this link on fb, I'll definitely be making some of these, so cute!
ReplyDeleteThank you Leatrice!
ReplyDeleteOh so creative and very beautiful! Thanks for sharing on Creative Monday and have a good week.
ReplyDeleteI love your adorable bows. So cute and colorful. Your newest follower from the newbie party. :)
ReplyDeleteAdorable! thanks for sharing with the newbie party.
ReplyDeleteHow pretty! -Marci
ReplyDeleteThese bows are just adorable and your tutorial is easy to follow...
ReplyDeleteThank you for sharing.
ReplyDeleteSuch cute bowes, great tutorial.Stopping by to say Hi from the blog hop. Come visit sometime, tea is cold and no shoes are required. Kathy B. http://www.southernmadeintheshade.blogspot.com
ReplyDeleteHi there very nice site!
ReplyDelete! Man .. Excellent .. Wonderful .. I'll bookmark your blog and take the feeds also? I'm happy to find so many helpful info
here within the put up, we need develop more strategies in this regard,
thank you for sharing. . . . . .