Dollar Store Craft - Luau Flower Hair Bow

A dollar store can be a great place to get inspiration and find supplies. My girls always notice when the Luau party items are in season. They are not allowed to wear jewelry at school so I think they want fancy hair accessories instead.  Myrrh has been requesting more flowers. I picked up some luau flower necklaces at the dollar store and created some great hair bows. What I like about them is that not only are they inexpensive, but an easy craft too. When looking at the finished product, I feel it was rewarding to make them. It is a fashion that will get you noticed.

easy flower hair bow craft hair accessory
Handmade Luau Flower Bow
Supplies:

Luau/Lei of flowers                                  $ 1.00
Foam or felt circle for back piece           < $  .25
Hair clip of choice                                  < $   .40
Embellishment of choice for the center  < $1.00
Scissors
Glue (hot glue gun)

luau flower hair bow craft
Luau Flowers from Dollar Tree.
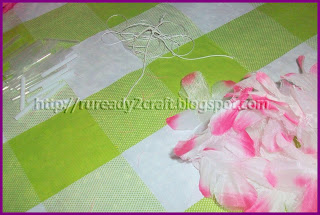
Step 1. Cut the string of the Lei necklace. Take the flower petals off the string.

luau flower petals for hair bow craft
Lei cut apart and flower petals separated.
Step 2. Use your center piece of material to attach the flower petals to. I use foamies I got on clearance. I have found them very useful.

luau flower hair bow craft
Foam center used to attach flower petals.
Step 3. Attach (I use a hot glue gun) one petal at a time layering them one on top of the other. When you layer them try to keep them centered, but alternate the petals for a fuller look. Be careful if you are using a hot glue gun. The flower material is incredibly flimsy and porous. The glue goes through easily. I used the end of a wooden dowel to press the petal down on top of the center while the glue was hot.
luau flower petal dollar store hair bow craft
Layers of luau flower petals with glue in the center.
Bottom view of luau flower petals attached to center piece.
Step 4.  Once you have done enough layers to achieve the look you want, attach your choice of embellishment to the center.
luau flower petals with embellishment for hair bow craft
Butterfly embellishment in the center of luau flowers.
luau flower petals with embellishment for hair bow craft
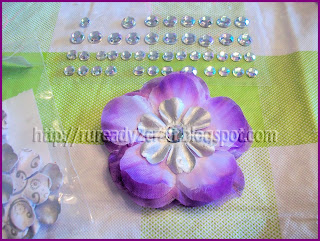
Different ideas for center embellishments.
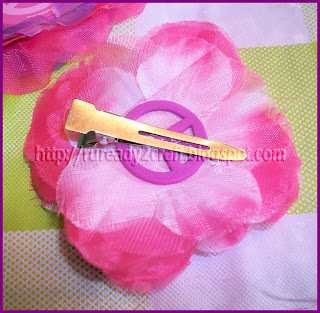
Step 5. Attach your choice of hair clip to the back of the center piece.

luau flower petals attached to hair clip
Luau flower attached to hair clip for a beautiful bow.
These are so easy to make that I can do several at one session of sitting doing crafts. I can make 6 of these in the same time it takes me to make one Gardenia Flower Hair Bow.

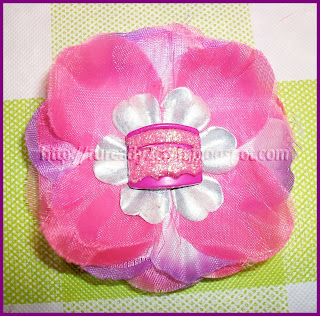
Shades of pink flower center in luau flower petal hair bow
Shades of pink flower center in luau flower petal hair bow.

Purple Butterfly Luau Flower Hair Bow
Purple butterfly luau flower hair bow
I let the girls pick out the center embellishments they want. These bows will be a great addition to their collection of hair accessories. Their wardrobes have plentiful supplies of purple and pink outfits. 

Pink cake Luau Flower Hair Bow
Pink cake luau flower hair bow
Dollar store luau flower petal hair clip bows
I made these all in one craft session.

Handmade beautiful luau flower petal hair bows
Handmade beautiful luau flower petal hair bows.
These look fabulous in the hair. I think the next time I am in the dollar store I will pick up some different colors of the luau flower necklaces.

I have posted in these crafty parties and Making the World Cuter.

Gardenia Flower Hair Bow Craft

While the girls are sleeping, I wanted to get this post out.
I had a few requests for a tutorial on this style of bow. Since I can't do korker bows right now I have found a new hair bow that I am enjoying. I call it my Gardenia bows. To me it looks like some Gardenia flowers I have seen. What is ironic is that I am allergic to Gardenias. I can still appreciate their beauty.
Gardenia Crown Flower Bow Craft for the hair
Favorite Gardenia Flower Bow, so far.

Flower Hair Bow Craft
1st Attempt of a Gardenia flower hairbow.
The first one I made I gave as a gift attached to the bow holder I made as a birthday present. It was the favorite of several of the birthday guests as well as others who saw my post.  Now each time I make it I learn something new.

Materials:
  • Ribbon (You can use almost any size)
    • For the 2 outer bottom layers I used 5/8" ribbon.
    • For the 2 top inner layers I used 3/8" ribbon.
  • Circle for the center anchor piece (felt, foam, use your imagination)
    • A peace symbol foamie from a bag I got on clearance at Michaels.
  • Scissors
  • Flame/Heat source to seal the end of the ribbons you cut (I use a lighter.)
  • Glue (Using a hot glue gun works best for me.)
  • Embelishment of choice for the center (A crystal like gem looks nice.)
  • Preferred type of hair accessory to attach the bow. (I use a ribbon covered single prong metal hair clip.)
Step 1. Cut 8 ribbons for each layer. Start with the largest ribbon for the outer layer. I chose to start with 4 inches.
cutting ribbon for creating hair bow
Cutting 4 inch length of 5/8" ribbon
Step 2. Heat seal the ribbon on the ends to keep them from fraying.

Step 3. Take your first 4 inch ribbon, put a dab of glue on the top bottom piece of the ribbon, create a loop and glue just the bottom ends together. The loop is like those remembrance ribbons, just don't leave any tail. Maybe if I say it is half of an infinity symbol? Not quite sure how to explain it. I hope the pictures help.
ribbon for flower bow
The loop to glue. Looks like a cone with shorter ribbon.
Step 4. Attach each loop at the end onto the top of the circle. Placing each loop across from the other making a cross pattern. Each set of 4 loops makes a square or cross. The first layer is 8 loops.

ribbon loops for layer of flower bow
1st cross pattern of 1st layer of ribbons.

Finish 1st bottom layer of bow filling in the gaps.
If you turn your creation upside down it looks like a flower too.

foam circle used at center of ribbon loops
Upside down, bottom view of the bow with loops attached to foam circle.
Step 5. After your first set of 8 ribbon loops creating the bottom layer, repeat each layer using smaller ribbon loops. My 1st attempt, picture above, I only did 1 complete layer of 8 ribbons and only 4 ribbons on the top/last layer.

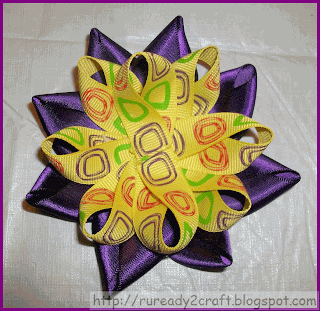
You can experiment with lengths and widths of the ribbon. With this purple/yellow Gardenia flower bow below, both layers are the same size length, 4". The purple ribbon is 7/8" ribbon.
layers of looped ribbon for flower bow craft
7/8" purple ribbon 4" long, 5/8" yellow ribbon 4" long.
Step 6. I suggest your last layer be with 3/8" ribbon, it really looks good like the bow below.
Purple Gardenia Flower Hair Bow handmade
Purple Gardenia Flower Hair Bow.
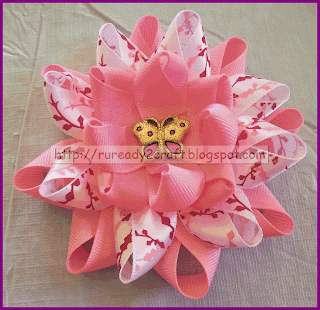
If you stay with the 5/8" size you may not want to do as many layers. I wasn't thrilled with the outcome of the pink ribbon flower below. It is one I would like to change. I don't like the last layer of the 5/8" ribbon. The pink one was the 2nd one I had ever made, so I learned to use the 3/8" ribbon for the last layer like in the blue and purple ones above.
Gardenia flower bow craft
Least favorite Gardenia flower craft bow.
Step 7. Place chosen embelishment in center of flower. My daughters always pick the embellishments for the middles.
homemade Gardenia flower hair accessory
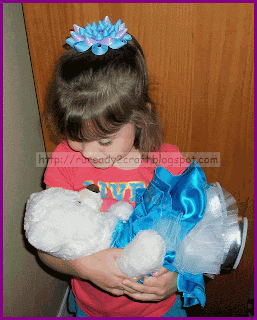
Almost looks like a crown for a princess!
Step 8. Attach Gardenia flower to the hair accessory of your choice. I attached it to a single prong metal hair clip.
Blue Gardenia Flower Crown Hair Bow craft
Handcrafted Blue Gardenia Flower Hair Bow.
After wearing it a few times, it seems that others seem to think it looks like a crown on my daughters head. So maybe I should call it a Crown Flower Bow. What do you think I should call it?

I am linking up to these craft parties!


Do You Need a Break?

Totally copying this from my other blog. It applies just the same.

I am trying to be as "Hands Free" as possible this week. I am taking the lead from Hands Free Mama. Her blog has really awakened me to the lost moments of childhood due to my distractions.


Hands Free Mama blog
Best Mom Blog Ever!
My girls will be starting school on Monday. Once they are in school, it will be hectic, but we will have a set schedule. We work much better with a strict schedule. Although, we spent many weeks of the summer in camps or VBS, there were plenty of days to seek opportunities for fun. I do look forward to a consistent schedule week after week. It will provide better organization, but I will mourn what we didn't have time to do before the start of school.

I will only be online after they are in bed, or before they wake up. That is only enough time to check e-mails and Facebook. I won't be able to blog anytime soon. It will be after July 17th for sure.

I will be on Facebook. Have you liked my page yet? RUReady2Craft, Check it out. Be sure to see the other cool crafts I find from other sites.

Have a great summer break. If you have children or not, enjoy the moments you have with other people. Focus on relationships without distractions.


4th of July Fireworks Craft

After another craft fail, I needed to do something fast using all the supplies we already had out with the paint.  My girls were not going to move on from the craft fail unless we did something else right away. I found a nice easy Patriotic painting craft courtesy of Crafts~N~Things for Children blog. Google is my friend. A nice red, white and blue American craft.

These are nice since we may not see 'real' fireworks on the 4th of July. We live in the desert and sometimes due to extreme fire dangers they have to cancel them.
4th of July Firework Craft
Fireworks!
Fairly simple since we only needed the three Ps:
  • Paper
  • Paint
  • Pipe Cleaners
  • Scissors
Pipe cleaners for Patriotic Craft
Pipe Cleaners. They can be any color.
1. Cut the pipe cleaners to create what the girls first thought looked like a flower. Once they had it twisted and laid out the way they wanted them, they accepted they were fireworks.

Pipe Cleaner Firework
A Firework with a handle.
2. Dip the firework into the paint. Place more paint on with a brush if you want a fuller look.

dipping firework craft into the paint
Adding paint to the firework.
3. Stamp the paint coated piper cleaner onto the paper.
painted fireworks craft
Painted firework print on paper.
4. Repeat # 2 & #3 for each color.

When stamping down the pipe cleaner firework my girls wanted it thicker so they pressed with their fingers. You can see finger smudge and smear marks on the paper. If you want to avoid that, use a stick instead.
pipe cleaner firework for painting
Fireworks stamp painted for the holiday.

stamp painted pipe cleaner holiday fireworks craft
Stamp painted firework on black background.
Once they were done with the pipe cleaner fireworks, they moved onto painting all kinds of things red, white and blue. There were the small boxes, small cardboard left over from the boxes, and the paper plates themselves.
holiday craft memorial day fireworks flag homemade
Red, white and blue everywhere!
After the paint stamped fireworks were dry, the girls decided they needed to add glitter glue. Where would fireworks be without glitter glue? After that, they declared they were done.
pipe cleaner painted craft 4th of July fireworks
Fireworks with the glitter glue touch.
Have a wonderful Day of Independence celebrating the 4th of July!


Another Craft Failure

Sometimes I wonder where is my common sense. I wanted to do a fun holiday craft with my girls. I saw this neat banner on Country Living and thought, "Oh, we could do a variation of that for our craft."
Craft banner from country living http://www.countryliving.com/syndication/fourth-july-crafts-syn#slide-1
Banner craft from Country Living website.
For a very novice craft person (yes, I said it) little warnings should have gone off when I thought 'variation'. 
http://www.countryliving.com/syndication/fourth-july-crafts-syn#slide-2
Rosettes for the banner from County Living.
Here was my erroneous thinking. We would dip newspaper into paint to create a red, white and blue type fan flower. See, if you are a 'crafter' you already know where this is going.


What made me think that water based paint would work on paper? Now that I think about it, wet newspaper is a disaster unless you are making paper mache. I clearly hadn't thought it through.


All the paint did was make wet newspaper.


I put them out in the hot sun to dry. I was still delusional enough to think maybe when they dried it would look better.

It just turned out to be a mess as I tried to create the 'fan'.  Another craft fail. I have got to stick with what I know. If I am going to try to be original then I need to try it out before I sit down with the kids to do it. My girls were not impressed. They wanted to paint and they wanted to paint now. I was able to find them something quickly. It saved the day. See my next post for the 4th of July craft that succeeded. Until next time, may all your crafts work out better than mine.